Septic inspection tools: what they are and how each one works
By the SepticMind Editorial Team
TL;DR
- A thorough septic inspection uses five core tools: a sewer camera (scope), a probe or locating rod, a tank-opening tool, a sludge judge or measuring stick, and a dye test kit.
- Professional inspectors may add ground-penetrating radar or electronic locators for hard-to-find tanks.
- Together they confirm tank condition, locate components, and assess drain field function before problems get expensive.
Why the right tools matter for a septic inspection
A septic system hides almost everything underground. The tank, the distribution box, the leach field laterals, all of it is buried, often under years of landscaping. Inspectors who show up with just a probe rod and good intentions miss a lot. The tools available today can reveal cracked baffles, failed inlet lines, saturated drain fields, and a tank that's three-quarters full of sludge, none of which is visible from the surface.
The EPA's SepticSmart program recommends that homeowners have their systems inspected by a professional every one to three years depending on household size and system type [1]. That recommendation only means something if the professional is actually doing a real inspection, more than lifting a lid and eyeballing the water level. The tools define the inspection.
For homeowners, knowing what tools a competent inspector brings lets you vet who you're hiring. For septic service operators, the gear on the truck is the difference between a thorough report and a callback two weeks later. This article covers the full toolkit, what each tool costs to own or rent, when it's worth deploying, and where the real diagnostic value lives.
What are the essential tools for any septic inspection?
Every inspection, regardless of system age or complexity, needs these five items at minimum.
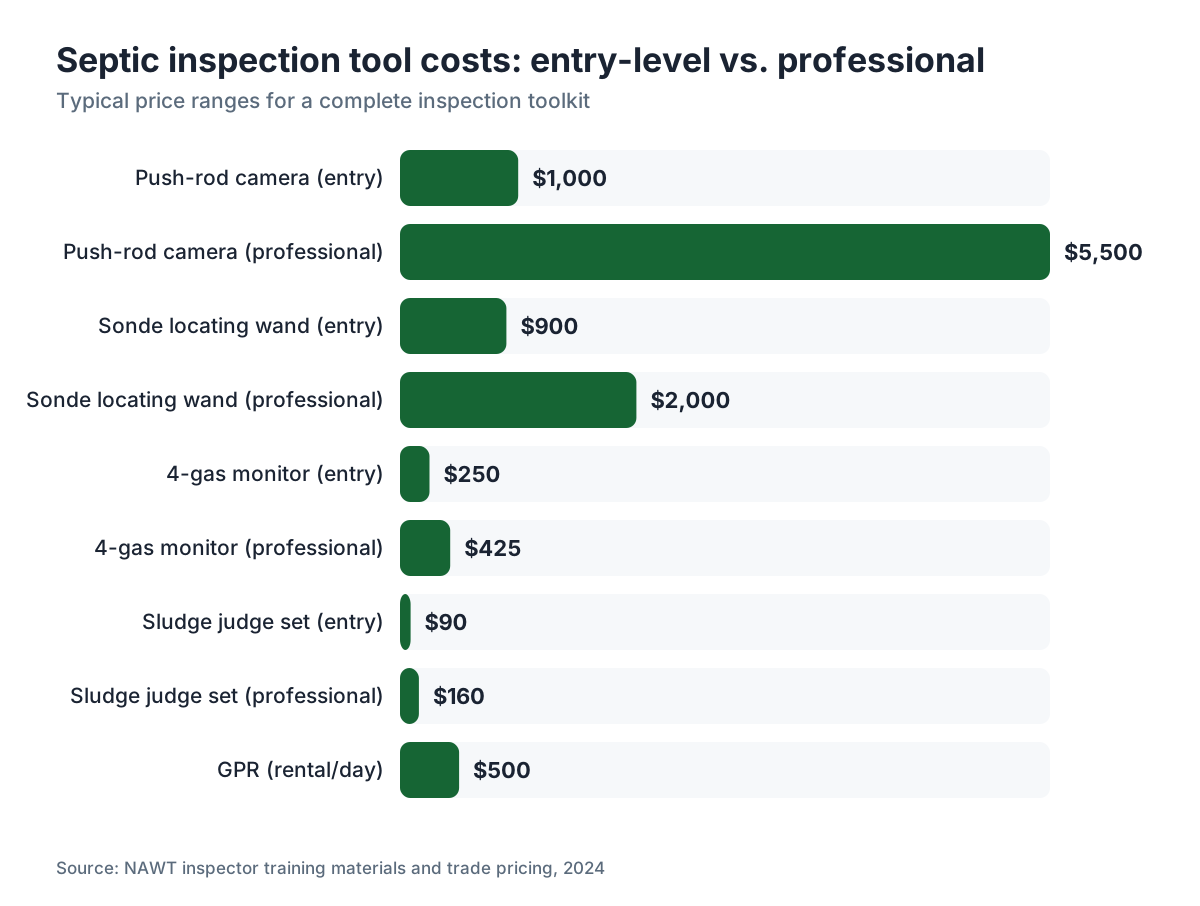
Sewer camera (push-rod inspection camera). This is the workhorse. A flexible cable with a camera head and LED lights on the front gets pushed through the inlet or outlet pipe, letting the inspector see the interior of the pipe and the baffles in real time. Good units transmit live video to a monitor and record footage for the report. Entry-level push-rod cameras run roughly $500 to $1,500 for a 100-foot setup. Professional-grade units with self-leveling heads and sonde transmitters (more on those below) run $3,000 to $8,000 [2]. Rental from a plumbing supply house is typically $75 to $150 per day if you only need one occasionally.
Probe rod or locating rod. A 5/8-inch or 3/4-inch steel rod, usually in 4-foot sections that thread together, is pushed into the ground to locate buried tank lids and distribution boxes. This sounds low-tech because it is. A good probe rod costs $30 to $80 for a three-section set. Simple as it is, experienced hands can feel the difference between soil, gravel, concrete, and fiberglass in seconds.
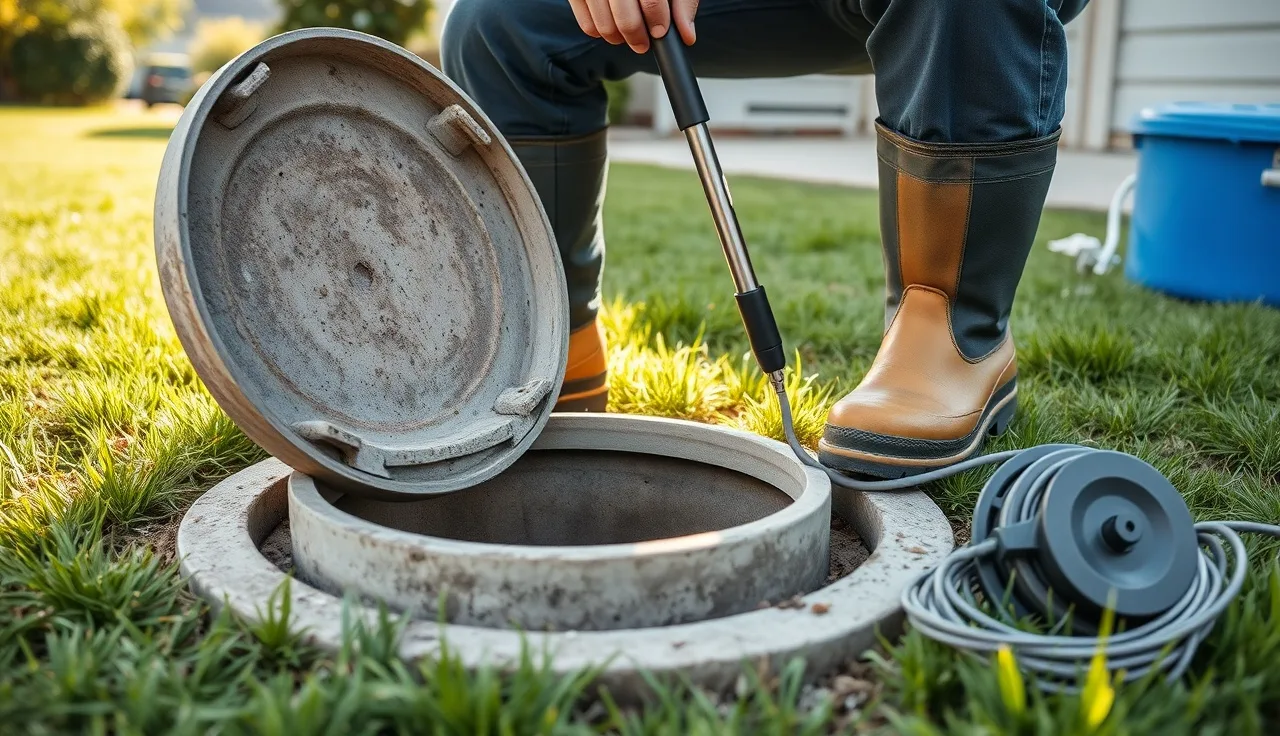
Tank-opening tools. This is a set of lid hooks, pry bars, and a riser adapter if the tank access sits below grade. Most pumpers carry a combination pry bar and hook. The real consideration here is personal protective equipment: nitrile gloves, eye protection, and a half-face respirator rated for hydrogen sulfide (at minimum an OV/P100 combination cartridge). Hydrogen sulfide reaches dangerous concentrations inside septic tanks and can appear above the open lid in still air [3].
Sludge judge (clear acrylic core sampler). This is a clear PVC or acrylic tube, typically 1.5 inches in diameter and available in 6-foot and 10-foot lengths, that you push to the bottom of the tank, trap the contents with a thumb valve, and pull out. The column of liquid and solids you extract shows the sludge depth at the bottom and the scum layer at the top. EPA guidance says a tank needs pumping when the sludge layer is within 12 inches of the outlet baffle or when scum is within 3 inches of the bottom of the outlet [1]. Without a sludge judge, you're guessing.
Measuring tape or folding rule. You need to record tank depth, sludge depth, and scum thickness precisely. A 10-foot fiberglass measuring tape works fine. Write the numbers down. Real estate deals and lawsuits have turned on inspection reports that said "looks okay" with no measurements.
What does a sewer camera actually show during a septic inspection?
A sewer camera used during a septic inspection reveals root intrusion, pipe cracks and offset joints, collapsed pipe sections, deteriorated or missing inlet and outlet baffles, and grease buildup. On older concrete tanks, it often shows whether the tee or baffle is intact or has rotted away entirely, which is a major failure risk because a missing outlet baffle lets floating scum flow straight into the drain field.
Most residential sewer lines are 4-inch diameter, and a standard push-rod camera handles that fine. If the line is larger (6-inch cast iron on an older property, for example) you may want a larger-diameter camera head for better coverage. Pan-and-tilt camera heads give a full view inside the tank chamber itself, more than the pipe run, and are worth having on systems older than 20 years.
The sonde transmitter built into many professional camera heads lets the inspector pinpoint the camera's location on the surface with a locating wand. That's how you find a buried distribution box or a collapsed section of pipe when the probe rod isn't telling you enough. The camera and locator work as a pair.
For homeowners shopping for a camera for basic DIY use, a 100-foot push-rod unit in the $500 to $900 range is adequate for checking the inlet run and viewing baffles. It won't have a sonde, and the video quality at the low end can go grainy in dirty water, but it beats nothing. For operators doing ten or more inspections a month, the step up to a $4,000 to $6,000 unit with a self-leveling head, sonde, and onboard DVR pays for itself fast.
How do inspectors find a buried septic tank without digging up the yard?
Locating a buried tank is a real task on older properties where the "as-built" drawings are lost or were never filed. Inspectors use several methods, often in combination.
Probe rod method. Walk a grid pattern from the house, probing every 18 to 24 inches. Concrete tanks sound and feel different from native soil. Fiberglass tanks are trickier but still detectable. This is slow but cheap.
Sonde locator. Push a camera with a sonde transmitter through the inlet pipe. Walk the surface with the locating wand, which picks up the signal and shows direction and depth on its display. Most sondes locate accurately to within 6 inches at depths up to 10 feet. A decent sonde locator costs $600 to $2,500 depending on depth range and display quality [2].
Ground-penetrating radar (GPR). GPR sends radar pulses into the ground and reads reflections off subsurface interfaces, including concrete, fiberglass, gravel, and disturbed soil layers. It's the most reliable method for large properties or systems with multiple buried components. A GPR unit costs $15,000 to $40,000 to own, so most small operators rent or subcontract this. Rental runs $300 to $700 per day. The major manufacturers for septic-relevant GPR work include GSSI and Sensors & Software.
Electronic locators and transmitters. Some tanks have access risers with embedded metal rings or locating markers installed during original construction. A basic metal detector or pipe-and-cable locator can find these. Pipe locators that work by inducing a signal into a metallic pipe cost $800 to $3,000 for professional units.
Most routine inspections don't need GPR. A probe rod and a camera with a sonde handles the vast majority of residential calls. GPR earns its keep on large rural properties, properties with altered landscaping, and commercial systems.
| Locating method | Typical cost to operator | Depth capability | Best for |
|---|---|---|---|
| Probe rod | $30-$80 (tool purchase) | 5-6 ft | Basic residential |
| Sonde + locating wand | $600-$2,500 | 10 ft | Standard professional work |
| Pipe/cable locator | $800-$3,000 | 15 ft | Metallic pipes |
| Ground-penetrating radar | $300-$700/day (rental) | 20+ ft | Complex or large systems |
What is a dye test and what tools does it require?
A dye test is one of the simplest and oldest diagnostic methods in the septic toolkit. You flush fluorescent dye, typically a pre-measured tablet or liquid dose of fluorescein or rhodamine, into the plumbing of the house, then inspect the drain field area and any downslope surface water for color. If dye shows up at the surface of the drain field or in a nearby stream or ditch, the system is failing hydraulically. Wastewater is surfacing instead of being absorbed.
Dye test kits cost $15 to $50 for a box of tablets from plumbing supply retailers or online. The tool set is minimal: the dye, a flashlight or UV lamp for spotting faint traces, and sometimes a black-light wand for rhodamine dye. Some inspectors bring a UV lamp even when they expect a clean result, because faint dye traces disappear in daylight.
Dye testing has real limits. A negative result (no dye surfacing) doesn't confirm the drain field is healthy. It means wastewater is moving into the soil, but it could be saturating slowly, channeling through a single lateral while others sit blocked, or heading sideways toward a neighbor's property. Many state codes require dye testing as part of a real estate inspection disclosure but don't treat a negative dye test as a clean bill of health [4].
Some states have restricted or banned fluorescein dye near surface water over toxicity concerns at high concentrations, so check your state's onsite wastewater code before using it. Rhodamine WT, which is EPA-approved as a water tracer in low concentrations, is often the safer choice in sensitive environments [5].
What tools do inspectors use to assess drain field condition?
The drain field is where most septic failures actually live, and it's the hardest part of the system to assess without invasive testing. Here's what the toolkit looks like.
Soil probe (push-tube sampler). A hollow steel tube pushed into the drain field trench area pulls up a soil core. You're looking at whether the gravel around the leach lines is still open and draining, or has been replaced by a dark, biomat-clogged layer. Reading it right takes experience, but the tool itself costs $80 to $250 for a 1-inch diameter probe.
Moisture meter or electrical conductivity probe. High soil moisture in the drain field area, especially in dry weather, is a red flag. A basic soil moisture probe costs $20 to $100. More expensive multi-parameter probes measure electrical conductivity at the same time, which can flag the presence of wastewater because sewage carries higher ionic conductivity than rainwater.
Percolation (perc) test equipment. A perc test happens at the design stage, not during a routine inspection, but inspectors doing a pre-purchase assessment on a failing system sometimes request a remedial perc test to see whether a new field can be installed. The basic equipment is a drill or hand auger, a measuring stick, water, and a timer. No electronics needed.
Effluent distribution box inspection. The distribution box (D-box) sits between the tank and the field. Inspectors open it, check that flow is splitting evenly to all laterals, and look for solids carryover or one lateral hogging all the flow (which exhausts one section of the field while others go unused). The tool here is just the probe rod to find it and a pry bar to open it, plus a flashlight.
For operators doing detailed pre-purchase evaluations, the septic tank inspection coverage is worth reading alongside this, since the drain field and tank assessments are distinct but connected steps.
What safety equipment is non-negotiable during a septic inspection?
Hydrogen sulfide (H2S) kills. It's heavier than air, it collects in the headspace of septic tanks, and its rotten-egg smell actually disappears at concentrations well above the safe exposure limit because it paralyzes the olfactory nerve. The OSHA permissible exposure limit (PEL) for H2S is 20 ppm as a ceiling value [3]. Inside an active septic tank, concentrations can top 500 ppm. People have died leaning over open tank lids with no warning at all.
H2S gas detector. A clip-on, single-gas detector for hydrogen sulfide costs $80 to $200. A 4-gas monitor (H2S, CO, O2, and LEL for combustible gases) costs $200 to $500 and belongs on every truck [3]. These are not optional for operators. For homeowners doing a DIY lid inspection, at minimum use one before putting your face near an open tank.
Respirator. A half-face respirator with OV/P100 cartridges protects against H2S at low-to-moderate concentrations. A powered air-purifying respirator (PAPR) fits confined-space entry if that ever comes up, but routine lid-open inspections don't require entry.
Nitrile gloves and eye protection. Septic effluent carries pathogens including E. coli, Salmonella, and hepatitis A virus [6]. Disposable nitrile gloves and safety glasses are minimum PPE every time a tank gets opened, full stop.
Non-slip footwear. Wet grass and wet concrete lids around an open tank are a fall hazard. Rubber-soled boots are standard.
What tools does a septic inspector use for reporting and documentation?
The physical inspection is only as useful as the documentation that comes out of it. Reports end up in real estate transactions, permit files, and contractor bids. Sloppy documentation has caused real disputes.
Camera with decent resolution. Every opened lid, baffle condition, sludge judge reading, and D-box gets photographed. A smartphone works, but a waterproof camera or a ruggedized phone case makes sense given the environment.
Measuring wheel or GPS. Recording the exact location of tank lids, cleanouts, and D-box for the site sketch is faster with a measuring wheel than a tape measure. If your company does more than occasional inspections, a basic GPS unit that records coordinates to the nearest 3 feet earns its place on the site map.
Inspection report software. Paper forms work, but operators doing regular inspection work increasingly use mobile-first field software. SepticMind, for example, is built for septic service operators and includes inspection checklists, photo capture tied to report fields, and customer-facing output, so the report is ready to send before you leave the driveway. Software like this is where the operational efficiency gains live for companies running five or more inspections a week.
Sludge measurement log. Whatever form the report takes, it should record: tank capacity, sludge depth in inches, scum thickness in inches, inlet and outlet baffle condition, effluent level relative to outlet, any visible damage, and drain field surface observations. If those fields aren't in your report, add them.
What does a full septic inspection tool kit cost to put together?
Here's an honest breakdown for a professional septic service operator starting from scratch, using mid-range equipment.
| Tool | Entry-level cost | Professional cost |
|---|---|---|
| Push-rod sewer camera (100 ft) | $500-$1,500 | $3,000-$8,000 |
| Sonde locating wand | $600-$1,200 | $1,500-$2,500 |
| Probe rod set (3 sections) | $30-$80 | $80-$150 |
| Sludge judge (6 ft + 4 ft extension) | $60-$120 | $120-$200 |
| 4-gas monitor (H2S/CO/O2/LEL) | $200-$300 | $350-$500 |
| Respirator (half-face, OV/P100) | $30-$50 | $80-$150 |
| Dye test kit (25 tablets) | $20-$50 | $50-$100 |
| Soil probe (1-inch tube, 36 in) | $80-$150 | $200-$350 |
| Pry bars and lid hooks | $30-$60 | $60-$100 |
| Nitrile gloves + eye protection (bulk) | $20-$40 | $40-$80 |
| Total range | $1,570-$3,550 | $5,480-$12,130 |
For a homeowner doing a single DIY inspection (not a replacement for professional work, but useful between professional visits), the practical minimum is a sludge judge ($60 to $120), a probe rod ($30 to $80), a 4-gas monitor ($200 to $300), and gloves plus eye protection. That's roughly $300 to $500 and covers the basics safely.
For operators, the sewer camera is the biggest single investment and the one most worth buying rather than renting if you're doing regular work. The routine septic tank pump out calls where you document tank condition before and after pumping are where a good camera pays dividends on customer trust and liability protection.
Are there any newer or emerging tools changing how inspections work?
The core toolkit has been stable for decades, but a few newer technologies are getting real traction.
Crawler robots. For large-diameter pipes or tanks with internal damage, motorized camera crawlers are replacing push-rod cameras on complex jobs. These have pan-and-tilt heads, higher resolution sensors, and can travel longer runs with less signal degradation. They're common in municipal sewer work and are starting to appear in large commercial septic inspections. Cost to own: $8,000 to $30,000. Most residential operators rent these from specialty contractors.
Acoustic leak detection. Acoustic sensors pressed against the ground can pick up the sound of water moving through gravel or saturated soil. This is more established in water-main leak detection but has been applied to drain field assessment to find areas of active flow. Results depend heavily on operator skill, and the equipment costs $2,000 to $8,000.
Resistivity survey meters. Electrical resistivity tomography (ERT) maps soil moisture and conductivity across a transect without any digging. The University of Minnesota Extension has documented its use in drain field assessment [7]. Equipment costs $5,000 to $15,000, so this is a specialty-contractor tool, not a routine truck item.
Smartphone-based inspection apps. Not hardware, but software that walks an inspector through a standardized checklist, timestamps photos, auto-generates a report, and stores everything in the cloud has meaningfully improved documentation quality across the industry. The barrier here is behavior change, not technology cost. Apps are cheap or free at entry level.
For most residential inspections, none of these newer tools replace the camera, probe rod, and sludge judge. They supplement them on hard cases.
When should a homeowner call for a professional inspection versus using DIY tools?
The honest answer is that a homeowner with a sludge judge, a probe rod, a gas detector, and some basic knowledge can do a useful check of their own tank condition between professional visits. EPA's own homeowner guidance suggests checking sludge and scum levels annually on actively used systems [1]. That's a DIY-manageable task once you know how.
What homeowners cannot reliably do:
Camera a line and interpret what they see. Spotting a deteriorated baffle or a subtle pipe offset takes experience. A first-time camera user will likely miss the things that matter.
Assess drain field condition accurately. Probing the field, reading soil cores, and interpreting moisture data takes training, or you end up with false reassurance.
Conduct a pre-purchase inspection. Real estate transactions need a licensed inspector in most states, and an inspector's report carries liability. The National Association of Wastewater Technicians (NAWT) certifies inspectors specifically for this purpose [8].
Respond safely to a confined-space emergency. If someone ever needs to enter a tank vault for any reason, that requires full confined-space entry protocol under OSHA 29 CFR 1910.146, including an attendant, rescue equipment, and supplied air [3].
For homeowners tracking a system that's due for pumping, a sludge judge check once a year plus a dye test if you notice slow drains is reasonable DIY work. For anything involving real estate, a permit, a suspected failure, or a system older than 20 years, hire a certified professional with real equipment. See how often to pump septic tank for a fuller picture of the maintenance schedule that shapes when inspections are needed.
If you end up needing repairs after an inspection turns up problems, septic system repair and leach field are the right next reads. And if the system is beyond repair, cost to install septic system gives honest replacement numbers.
How do state regulations affect what inspection tools and methods are required?
State onsite wastewater codes vary a lot on what a "septic inspection" must actually include. Some states are detailed and specific. Others leave it to the judgment of licensed inspectors.
California, for example, requires that a Title 5 equivalent inspection (under local jurisdiction) include pumping the tank, inspecting all accessible components, and documenting the condition of the distribution system before an official inspection can be certified [9]. That drives tool requirements directly: you can't complete a compliant inspection without a pump truck and a camera.
Massachusetts Title 5 regulations (310 CMR 15.000) are among the most detailed in the country and require a licensed inspector to conduct a hydraulic load test, observe all accessible system components, and certify findings in a specific state-format report. The regulation text states that inspectors must "observe the system during a hydraulic loading test" [9], which in practice means a dye test or equivalent water-load observation.
Virginia, Texas, and many other states require licensed onsite soil evaluators or licensed professional engineers for certain inspection types, particularly those tied to system design or real estate disclosure.
For EPA guidance that applies across all states, the SepticSmart program's homeowner and inspector materials set the baseline best-practice expectations, and the EPA's 2002 "Onsite Wastewater Treatment Systems Manual" remains the most detailed federal reference for inspection methodology [10].
The practical takeaway for operators: know your state code before advertising inspection services. Calling something a "full inspection" when your state defines that term specifically can expose you to liability. Check your state environmental or health department's onsite wastewater program page for current requirements.
Frequently asked questions
What is the most important tool in a septic inspection kit?
The sewer camera (push-rod inspection camera) gives the most diagnostic information per dollar spent. It lets you see baffle condition, pipe integrity, and root intrusion directly, in real time. The sludge judge is a close second because without it you're guessing at tank fill level, which is the most common reason a tank needs service.
Can I do a septic inspection myself?
For basic tank monitoring, yes: a sludge judge, probe rod, and 4-gas monitor let a homeowner safely check sludge and scum levels. For a real estate inspection, pre-permit assessment, or suspected failure, you need a licensed professional with proper equipment. Misreading a DIY result on a failing system can mean a much more expensive repair later.
How much does a professional septic inspection cost?
A standard visual inspection with lid opening and sludge check typically runs $100 to $250. An inspection that includes camera scoping, drain field assessment, and a formal report costs $300 to $600 in most markets. Pre-purchase real estate inspections requiring pumping before inspection can run $400 to $800 depending on tank size and location.
What is a sludge judge and how do you use it?
A sludge judge is a clear acrylic tube, usually 6 to 10 feet long, with a ball-check valve at the bottom. You lower it to the tank floor, then cover the top with your thumb to trap the column of contents. When you pull it out, you can see the distinct sludge layer at the bottom and the floating scum layer, and measure each with a ruler.
What gas detector should a septic inspector carry?
A 4-gas monitor measuring hydrogen sulfide, carbon monoxide, oxygen levels, and lower explosive limit (combustible gases) is the standard. Single-gas H2S clip-on detectors cost $80 to $200 and are the minimum. Four-gas units cost $200 to $500 and are worth the upgrade. OSHA's H2S ceiling PEL is 20 ppm; tanks routinely exceed 500 ppm.
How does ground-penetrating radar help in a septic inspection?
GPR sends radar pulses into the ground and reads reflections off buried objects: concrete tanks, fiberglass tanks, gravel drain fields, and disturbed soil. It's the most reliable non-invasive method for locating components on large or landscaped properties. Equipment rental runs $300 to $700 per day. Most residential inspections don't need it; a probe rod and camera sonde are sufficient.
What is a dye test used for in a septic inspection?
A dye test flushes fluorescent dye through the house plumbing and into the septic system. Inspectors then check the drain field surface and nearby surface water for color. Dye surfacing means the system is hydraulically failing. A negative result doesn't prove the drain field is healthy, only that wastewater isn't surfacing at the time of the test.
How do inspectors find a buried septic tank lid?
Probe rods pushed into the ground every 18 to 24 inches can locate concrete or fiberglass tanks by feel and sound. A camera with a sonde transmitter pushed through the inlet pipe, paired with a surface locating wand, is more precise. On large or complex properties, ground-penetrating radar or a pipe-and-cable locator handles the job when probing takes too long.
What should a septic inspection report include?
At minimum: tank capacity, sludge depth in inches, scum layer thickness, inlet and outlet baffle condition (present, intact, deteriorated, missing), effluent level relative to outlet invert, photos of opened components, drain field surface observations, D-box condition if accessible, and the inspector's assessment of whether pumping or repair is needed. Measurements matter more than narrative.
Do state regulations specify what tools an inspector must use?
Some do. Massachusetts Title 5 requires a hydraulic load test and direct component observation. California requires pumping before certification in many jurisdictions. Most states require a licensed inspector but leave tool choice to professional judgment. Check your state environmental or health department's onsite wastewater program for specifics before conducting inspections commercially.
How often should a septic system be professionally inspected?
The EPA SepticSmart program recommends professional inspection every one to three years, with pumping every three to five years for a typical household. Systems with pumps, float switches, or mechanical components need annual inspection. Sludge levels should be checked at every pump-out to build a historical record that predicts the next service interval accurately.
What tools are used to assess whether a drain field is failing?
A soil probe (hollow push-tube) pulls cores to check for biomat clogging. A soil moisture meter identifies wet areas in dry weather. A dye test checks for surface breakout. The distribution box is opened and inspected for even flow to all laterals. Ground-penetrating radar and electrical resistivity surveys are available for detailed assessment but are specialty-contractor tools, not standard truck items.
Is a sewer camera useful for a homeowner or only for professionals?
Entry-level 100-foot push-rod cameras in the $500 to $900 range are available to homeowners and can show baffle condition and obvious pipe problems. The limitation is interpretation: identifying a subtle pipe offset or early baffle deterioration takes experience. For a one-time check before a home purchase, hiring a professional with a better camera is the smarter use of money.
Sources
- U.S. EPA SepticSmart homeowner guidance: EPA recommends professional septic inspection every one to three years and pumping every three to five years; tank needs pumping when sludge is within 12 inches of outlet baffle.
- National Association of Wastewater Technicians (NAWT) inspector training materials: Professional push-rod camera systems with sonde range from roughly $3,000 to $8,000; sonde locating wands from $600 to $2,500.
- OSHA Safety and Health Topics: Hydrogen Sulfide: OSHA's H2S PEL is 20 ppm as a ceiling; septic tank atmospheres routinely exceed dangerous concentrations; confined-space entry requires full OSHA 1910.146 protocol.
- U.S. EPA Septic Systems (SepticSmart) program: State codes may require dye testing as part of real estate inspection disclosure; a negative dye test does not confirm drain field health.
- U.S. EPA Water Research: Rhodamine WT is EPA-approved as a water tracer at low concentrations and is preferred over fluorescein in sensitive aquatic environments.
- CDC Healthy Water: Sewage and Wastewater: Septic effluent contains E. coli, Salmonella, and hepatitis A virus; direct contact requires PPE including gloves and eye protection.
- University of Minnesota Extension, Onsite Sewage Treatment Program: University of Minnesota Extension has documented the use of electrical resistivity methods in drain field assessment.
- National Association of Wastewater Technicians (NAWT) inspector certification: NAWT certifies septic inspectors specifically for real estate inspection purposes; certification involves standardized training and examination.
- Massachusetts Department of Environmental Protection, Title 5 regulations (310 CMR 15.000): Massachusetts Title 5 requires licensed inspectors to 'observe the system during a hydraulic loading test' as part of a compliant inspection.
- U.S. EPA Onsite Wastewater Treatment Systems Manual (EPA/625/R-00/008): EPA's 2002 Onsite Wastewater Treatment Systems Manual is the most detailed federal reference for septic inspection methodology and design.
Last updated 2026-07-09